
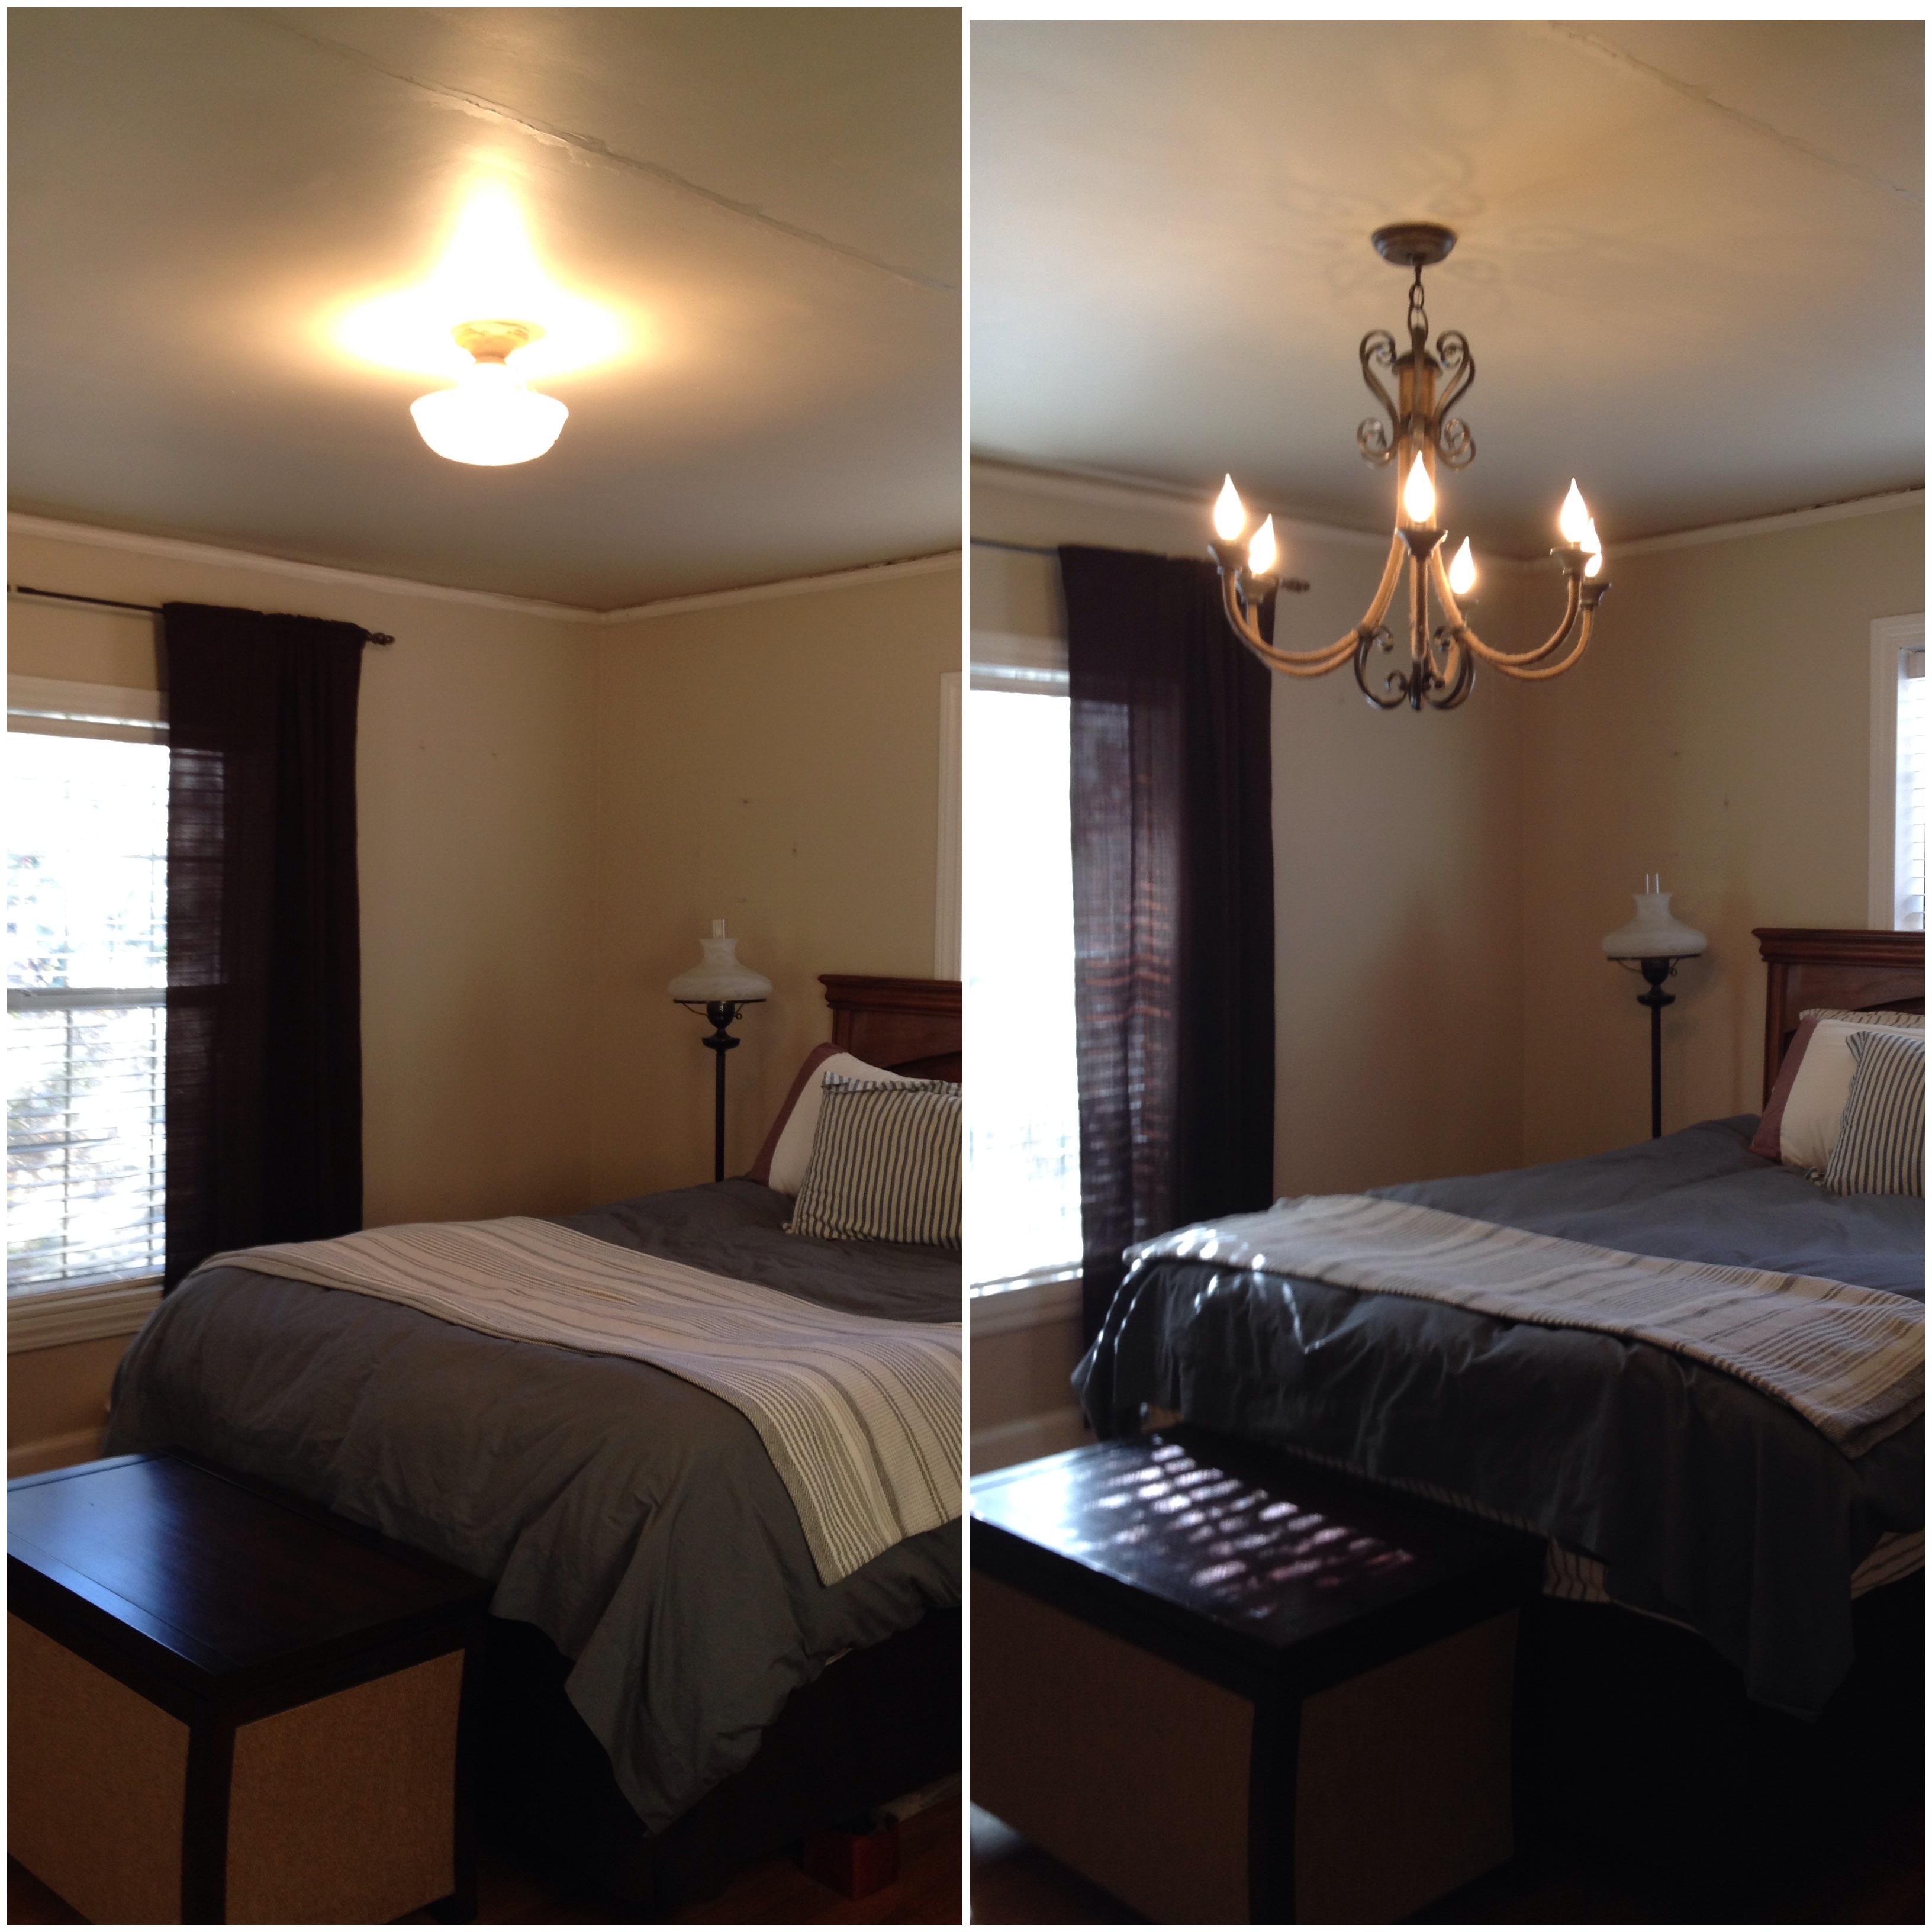
As I walked through our house for Project: Content-to-Rent, one of the things that stood out to both Eric and I was the light fixture situation. The house has some potentially original light fixtures installed, but I am pretty sure they haven’t been dusted in a decade, and they aren’t necessarily visually appealing.

Some of our friends have this incredible light fixture in their bedroom, and it is a great statement piece that adds personality to the whole room (plus it looks really cool reflected on the walls). When I saw how much it added to their room, I thought it might be a simple way to spice up our master bedroom, too.
I was looking through the World Market website, and this fixture caught my eye:

My first thought was, “I could do that for less than $180!” So I began the hunt for a chandelier.
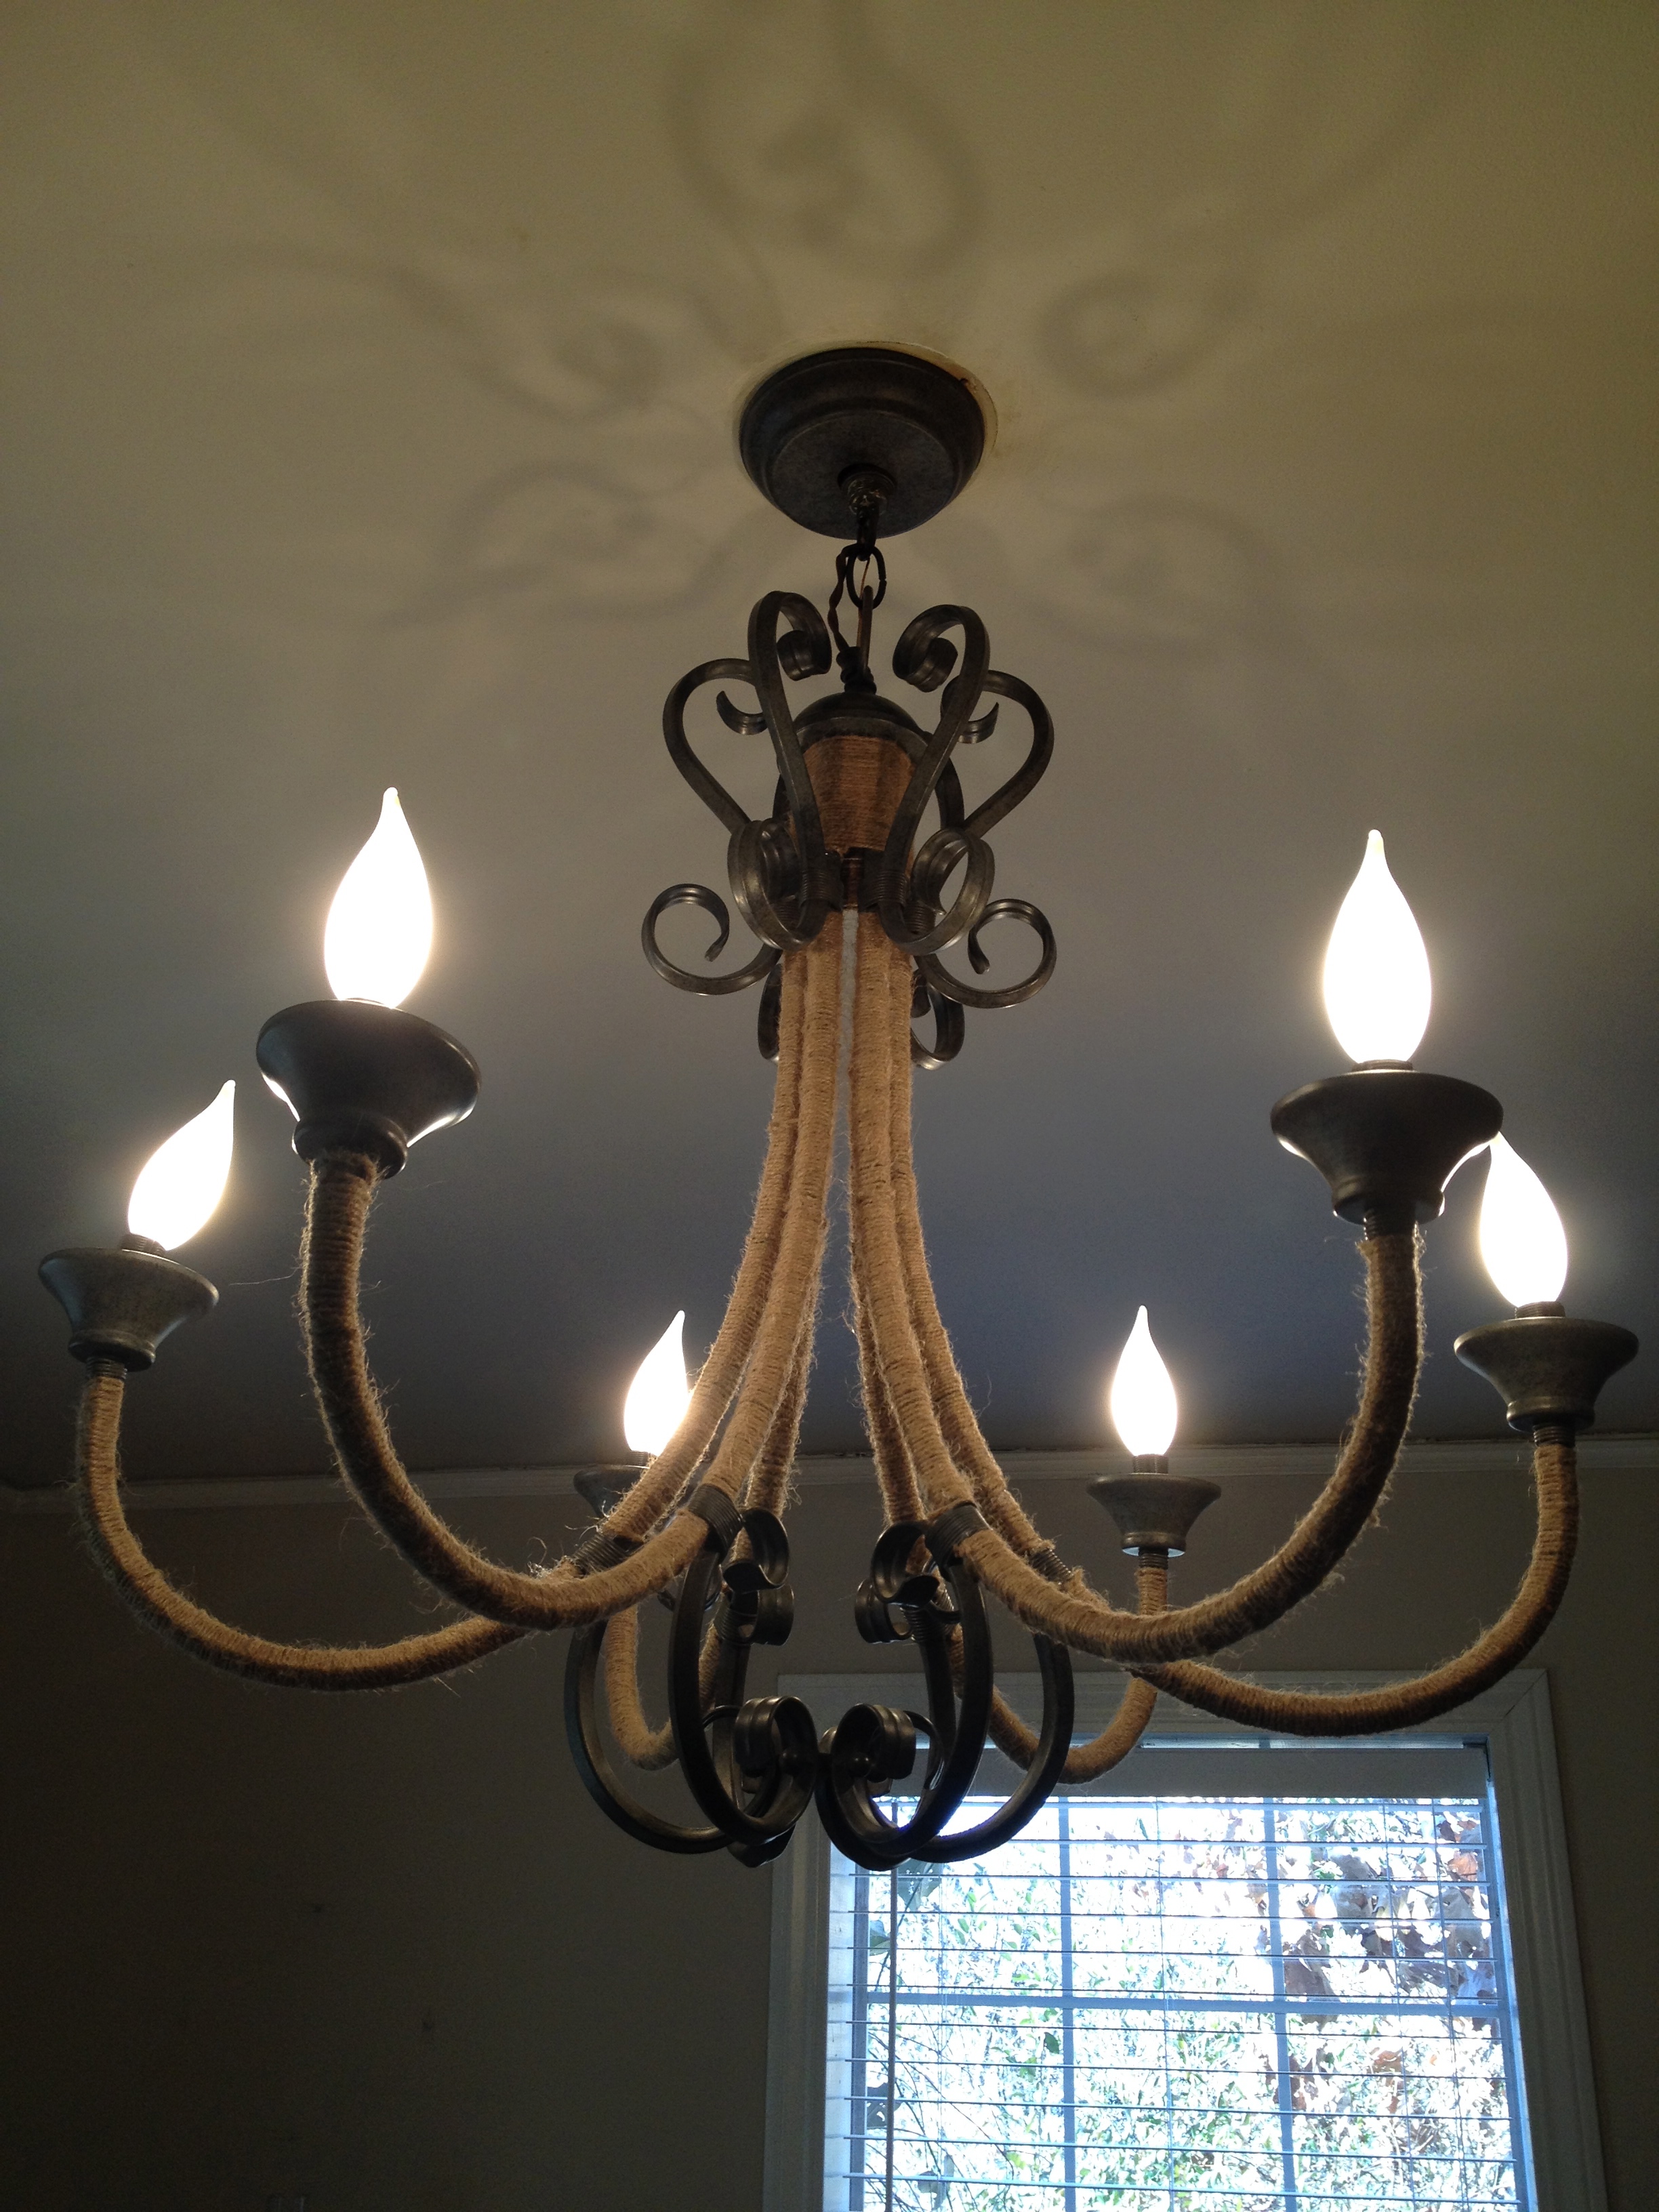
After searching several thrift stores, I turned to Craig’s list, and while I couldn’t find the traditional chandelier I was originally looking for, I was able to snag this piece for $25 bucks:

Unfortunately, the person who previously uninstalled this fixture thought it was the most sensible thing to do to simply snip all of the electrical wires below the ceiling, hence leaving no possibility for the existing wires to be connected to the solid wire in the ceiling. Thanks to the Home Depot forums, I was guided through the process of removing the existing wiring and replacing it with new wiring (supplies costed around $15).
The process of wrapping the fixture in twine wasn’t too difficult, though it was tedious and time-consuming. I decided not to wrap all of the scrolls – partly because I liked the mix of the twine and the metal, and partly because it was too intimidating to think about maneuvering.
I didn’t have to spend any money on the twine because I have a whole roll of it from crafts for my wedding… over two years ago! I’m not kidding when I say I use this ball of twine all the time, for crafts and gift wrapping and decorations. It’s like the widow’s flour and oil in the Old Testament – it never runs out! Though I used a pretty significant chunk of it for this project.
The worst part, we discovered, was actually hanging the fixture. Because this is an older house, all of the wiring is older, and it’s not as simple to just match up the correctly-colored wires. My grandpa was an electrician, though, so I was able to ask my dad lots of questions to make sure I wouldn’t mess anything up.
After the wiring was figured out, though, we discovered that the chandelier has a fairly inconvenient design to allow screwing it into the ceiling. It took multiple tries (and several moments of wanting to cuss) to get that thing secured.
And thankfully, we love how it turned out! It really transforms the feel of our bedroom:

I had a lot of fun playing with the wiring and asking the Home Depot guys questions. I really like knowing how things like that work, and it makes me less afraid to try other similar projects, now that I have a better understanding of what is involved.
And this was my selected project-of-the-month for Apartment Therapy’s January Cure, so I can check that off my list, as well! I also completed my weekend JC chores of vacuuming/mopping the floors and under the furniture, washing our bedding, and cleaning out my closet in the process, so it all worked together.
For less than $50, it’s not a bad statement piece to help transform our master bedroom, and it is giving me more ideas for a direction to go with the walls, which is the next focus in that room. Though getting proper nightstands and lamps is also a priority…
