
As I mentioned in the first post for Project: Content-to-Rent, we love our little rent home. It’s a great size and has some old house charm, but it easily feels cluttery or outdated.
When Eric asked me what I would change about this house, without a doubt the first thing that came to mind was the kitchen wallpaper.
Y’all. It was gross. It just made the kitchen feel dirty. I dislike the type of tile used on the floors, and the grayish grout always looks dirty as well, but that wallpaper. And the border. Words can’t do it justice. I am not sure pictures even can, but here goes:

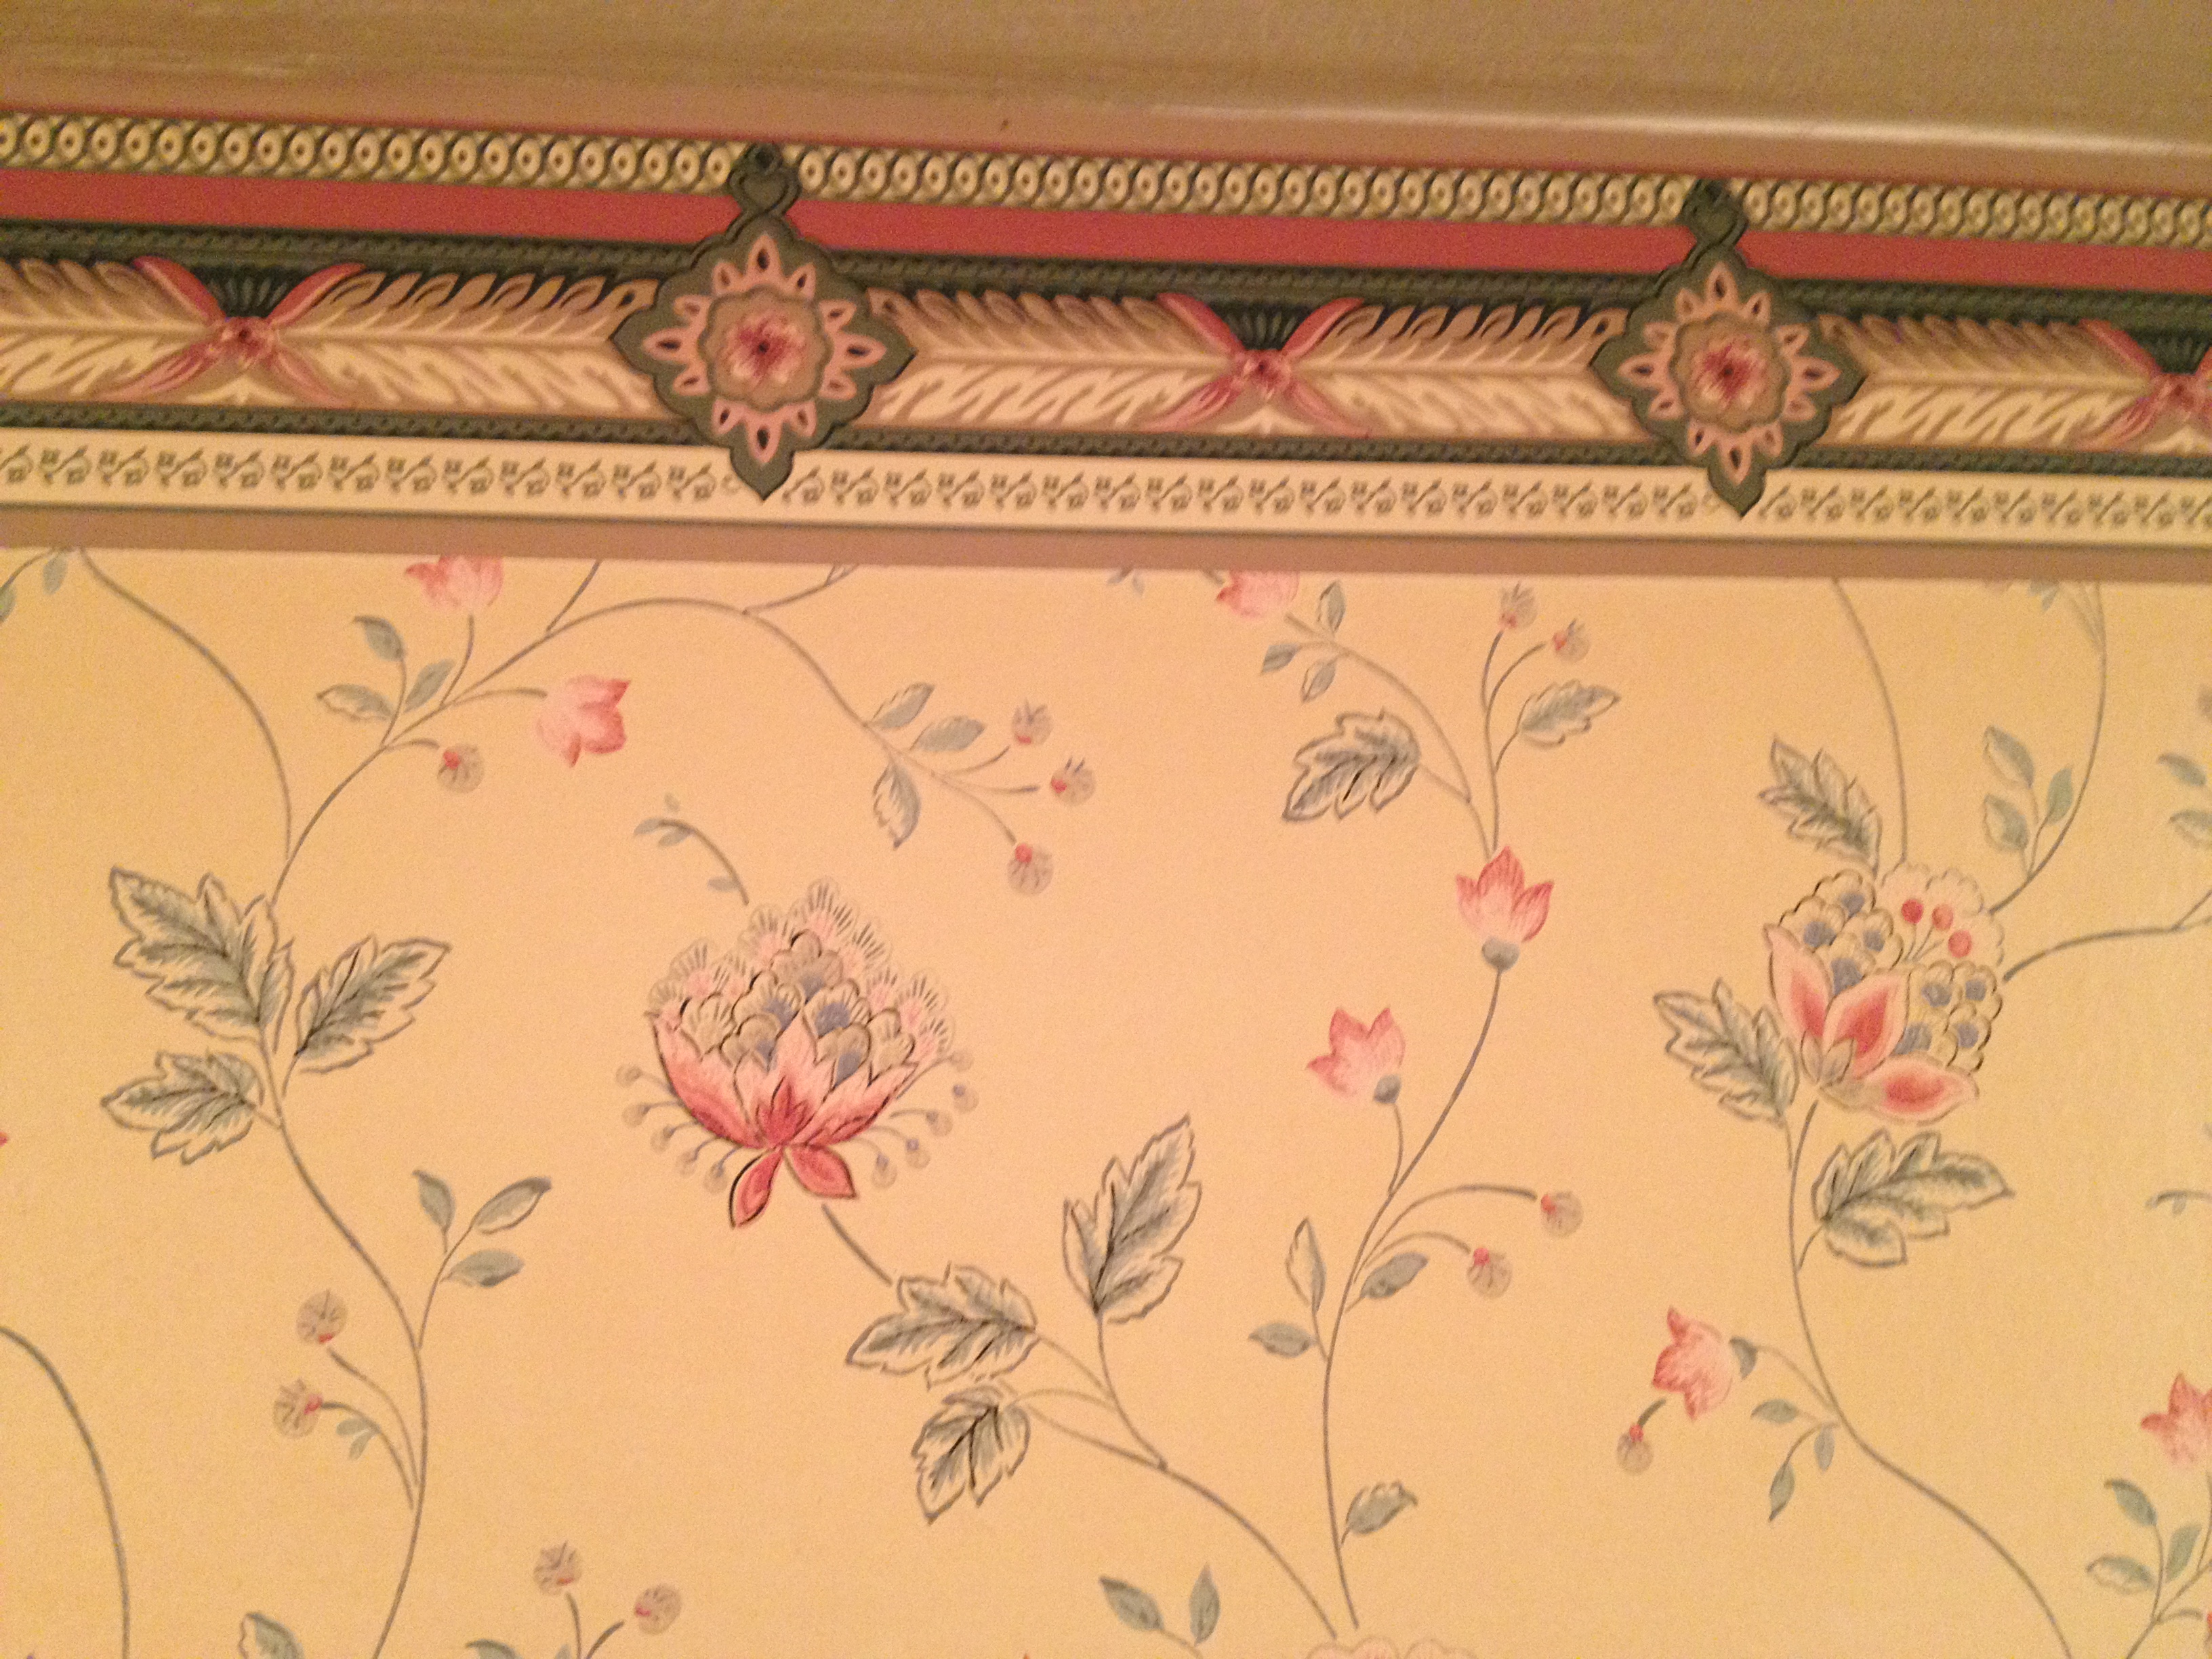
Who picks a southwestern-ish design for a border with floral wallpaper? I guess the colors kind of match, but seriously?
And we didn’t realize how yellowed the wallpaper had become until we pulled the light switch plate covers off and saw the color it should have been. Double ick.
For Christmas, we received some money from a grandparent, and we decided to put it to use for our first project.
Stripping wallpaper seemed a little daunting, especially in an old house when we had no idea what condition the walls were in. After some research, I discovered that you can use an oil-based primer to cover wallpaper if it is still in fairly good condition. This would help prevent moisture from damaging the paper underneath the paint.
So on the primer went! It took a couple of coats, and the oil-based made it a little more difficult to apply. We also encountered some problems as far as the wallpaper not having been applied correctly (in some places, there was excess wallpaper running along the ceiling or door frames), and we weren’t quite sure how to correct that, so we just made do the best we could and trying to spackle some places where the paper seemed to be peeling.
For the color, we picked a light “Driftwood Gray” (Glidden Martha Stewart), trying to find something neutral since it is a rent house, but also something that would not make the slightly off-white baseboards look dirty. The color ended up being a little more of a bluish gray than I anticipated, but it is growing on me.
We have another stage or two of this project – Eric is going to build me some shelves to help with the limited cabinet storage, and we will repaint the trim eventually – but here are some before and after shots:


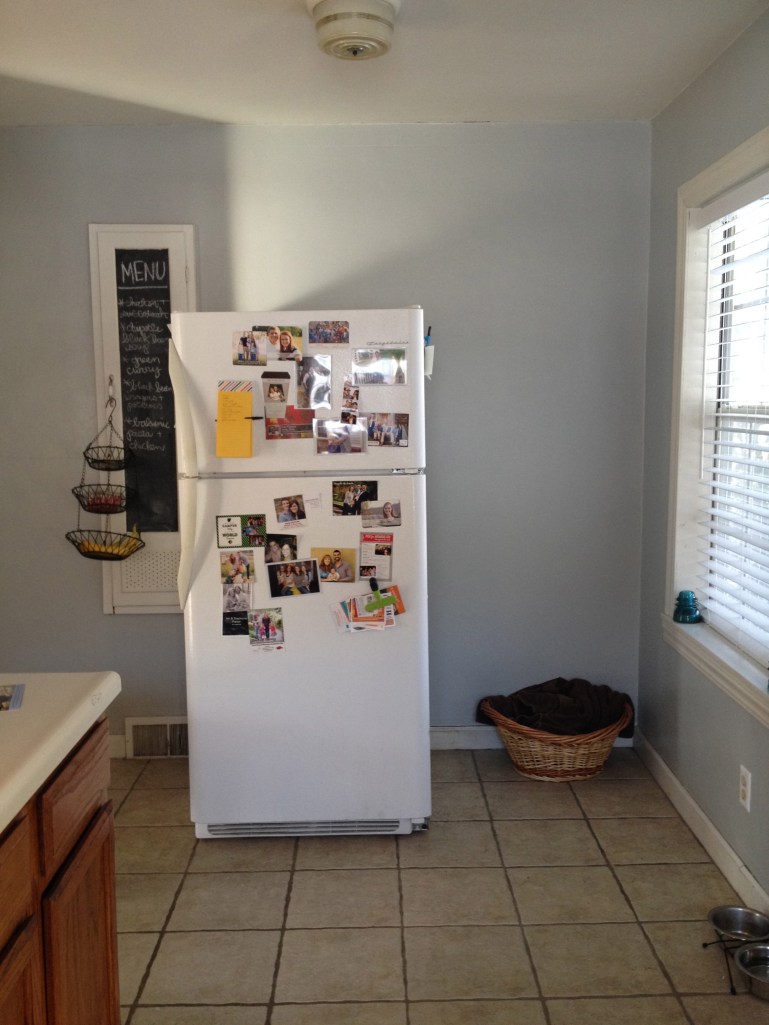
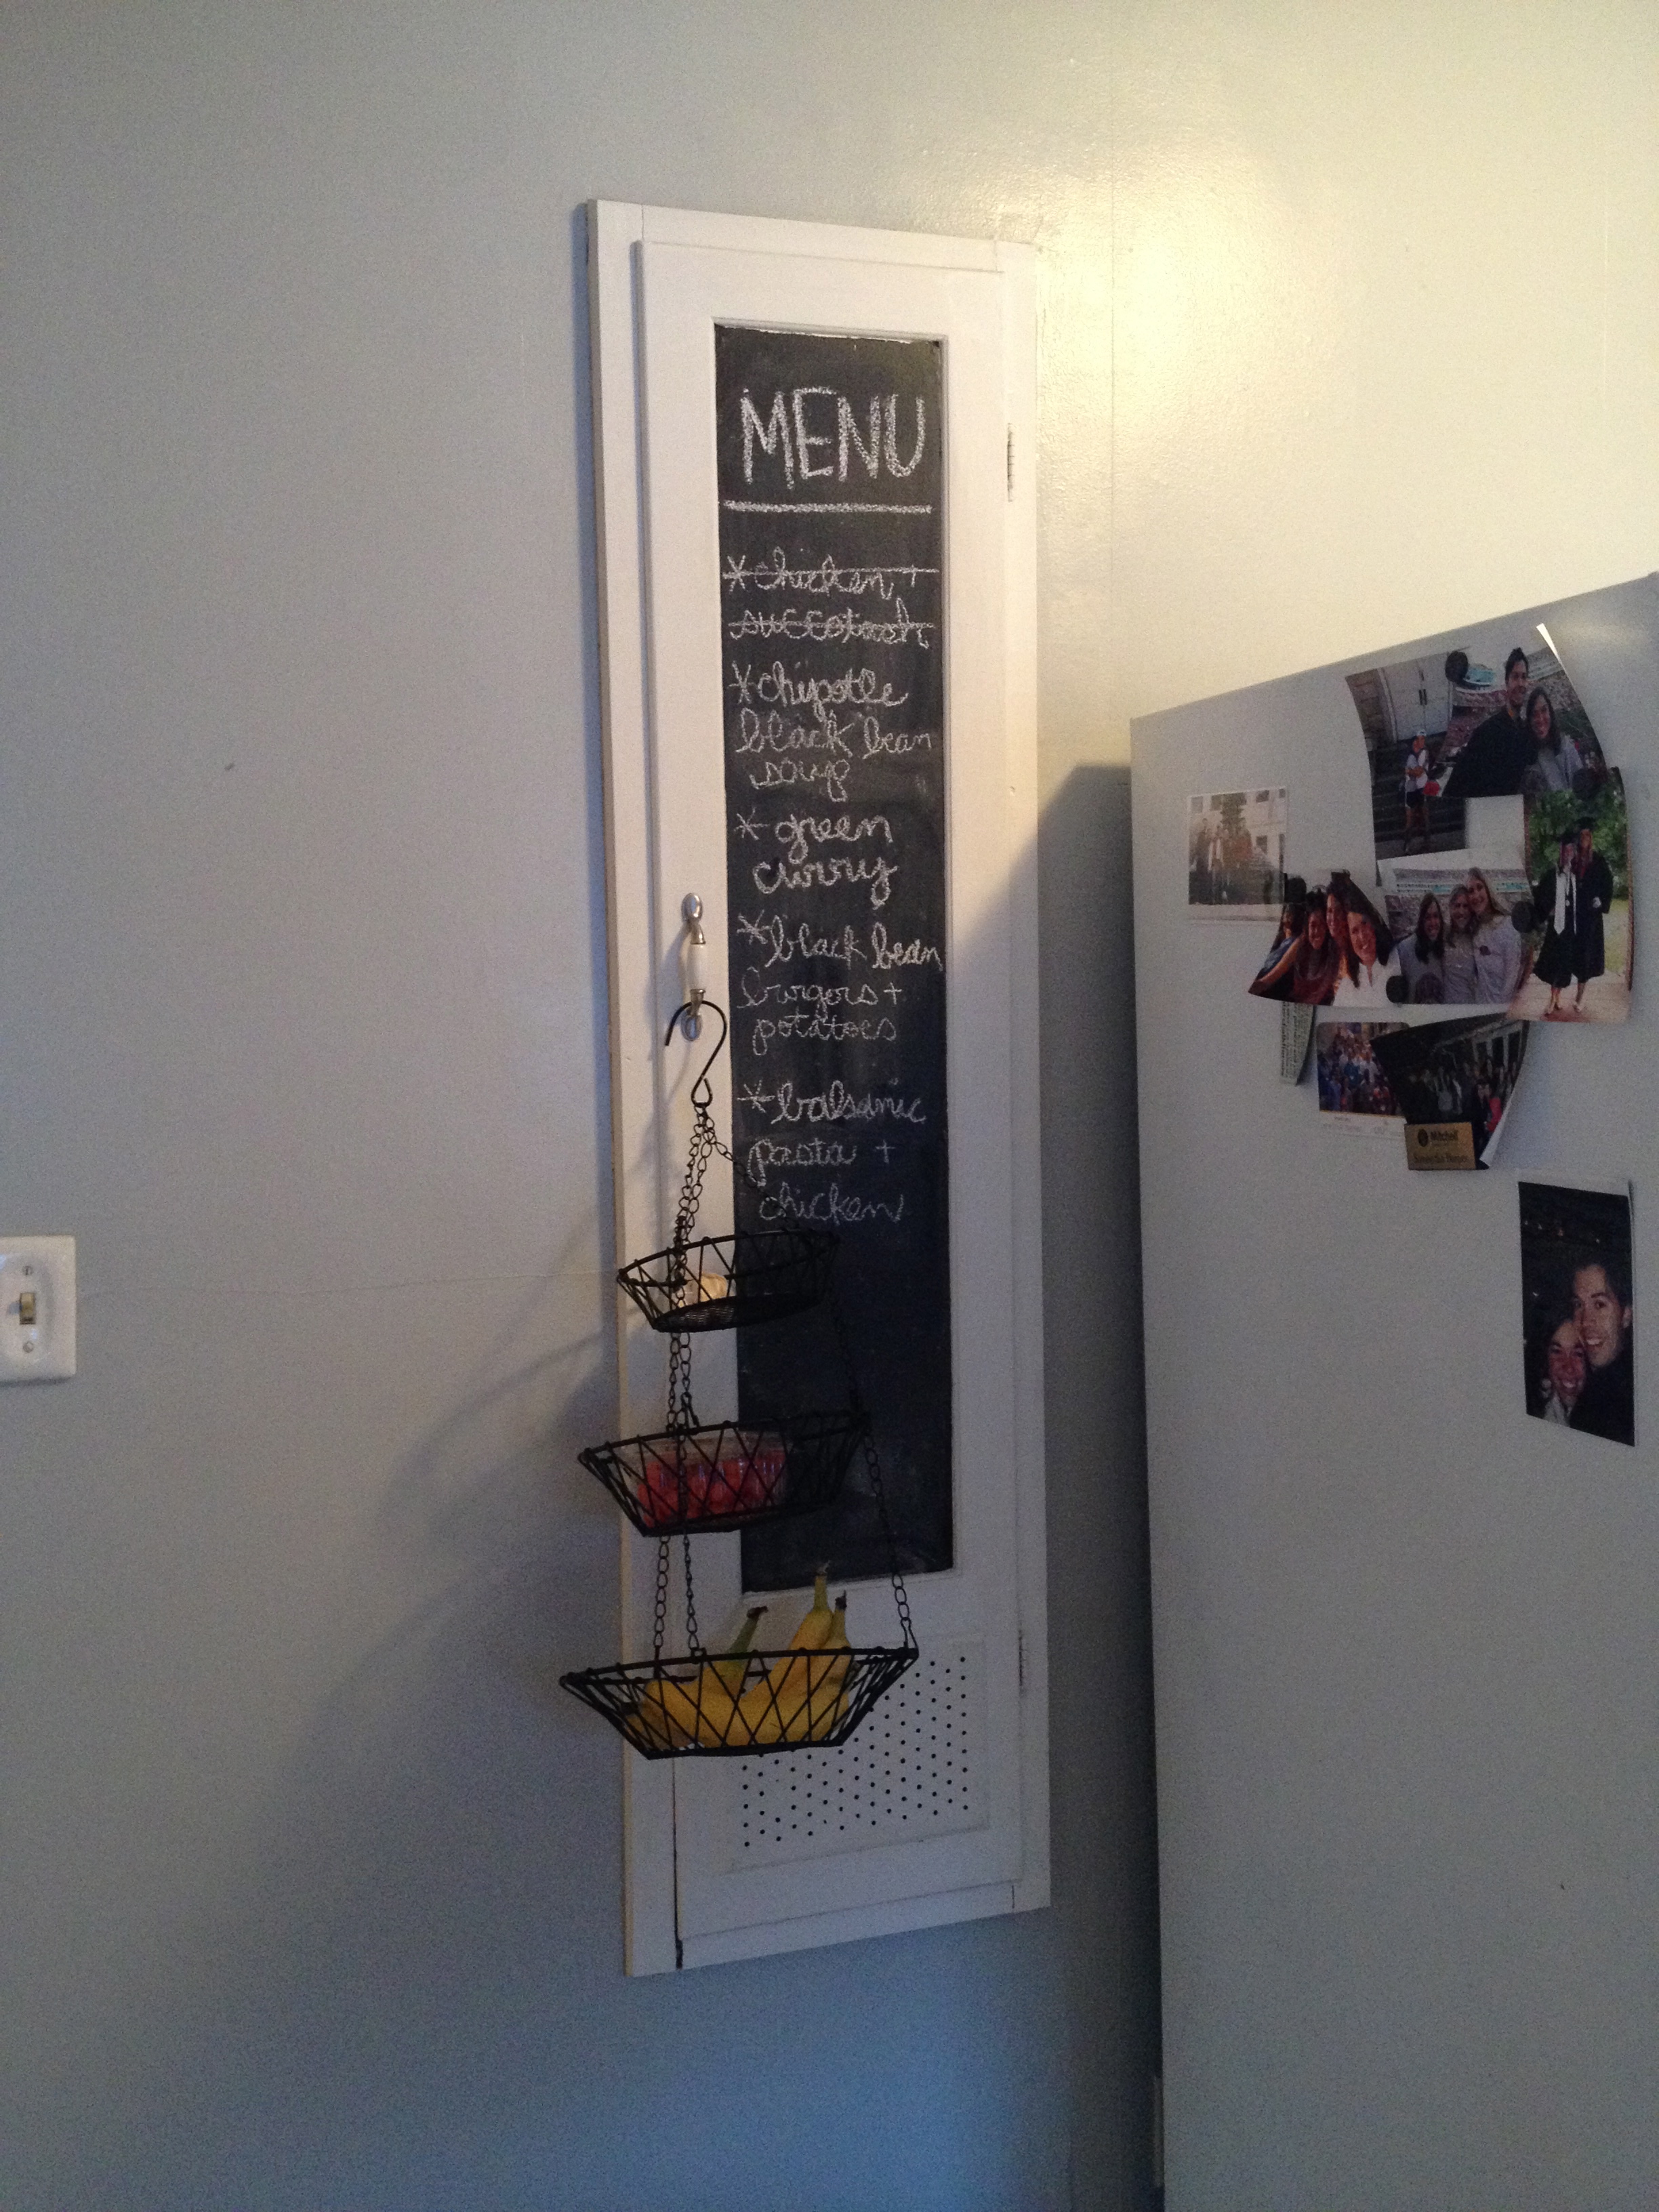
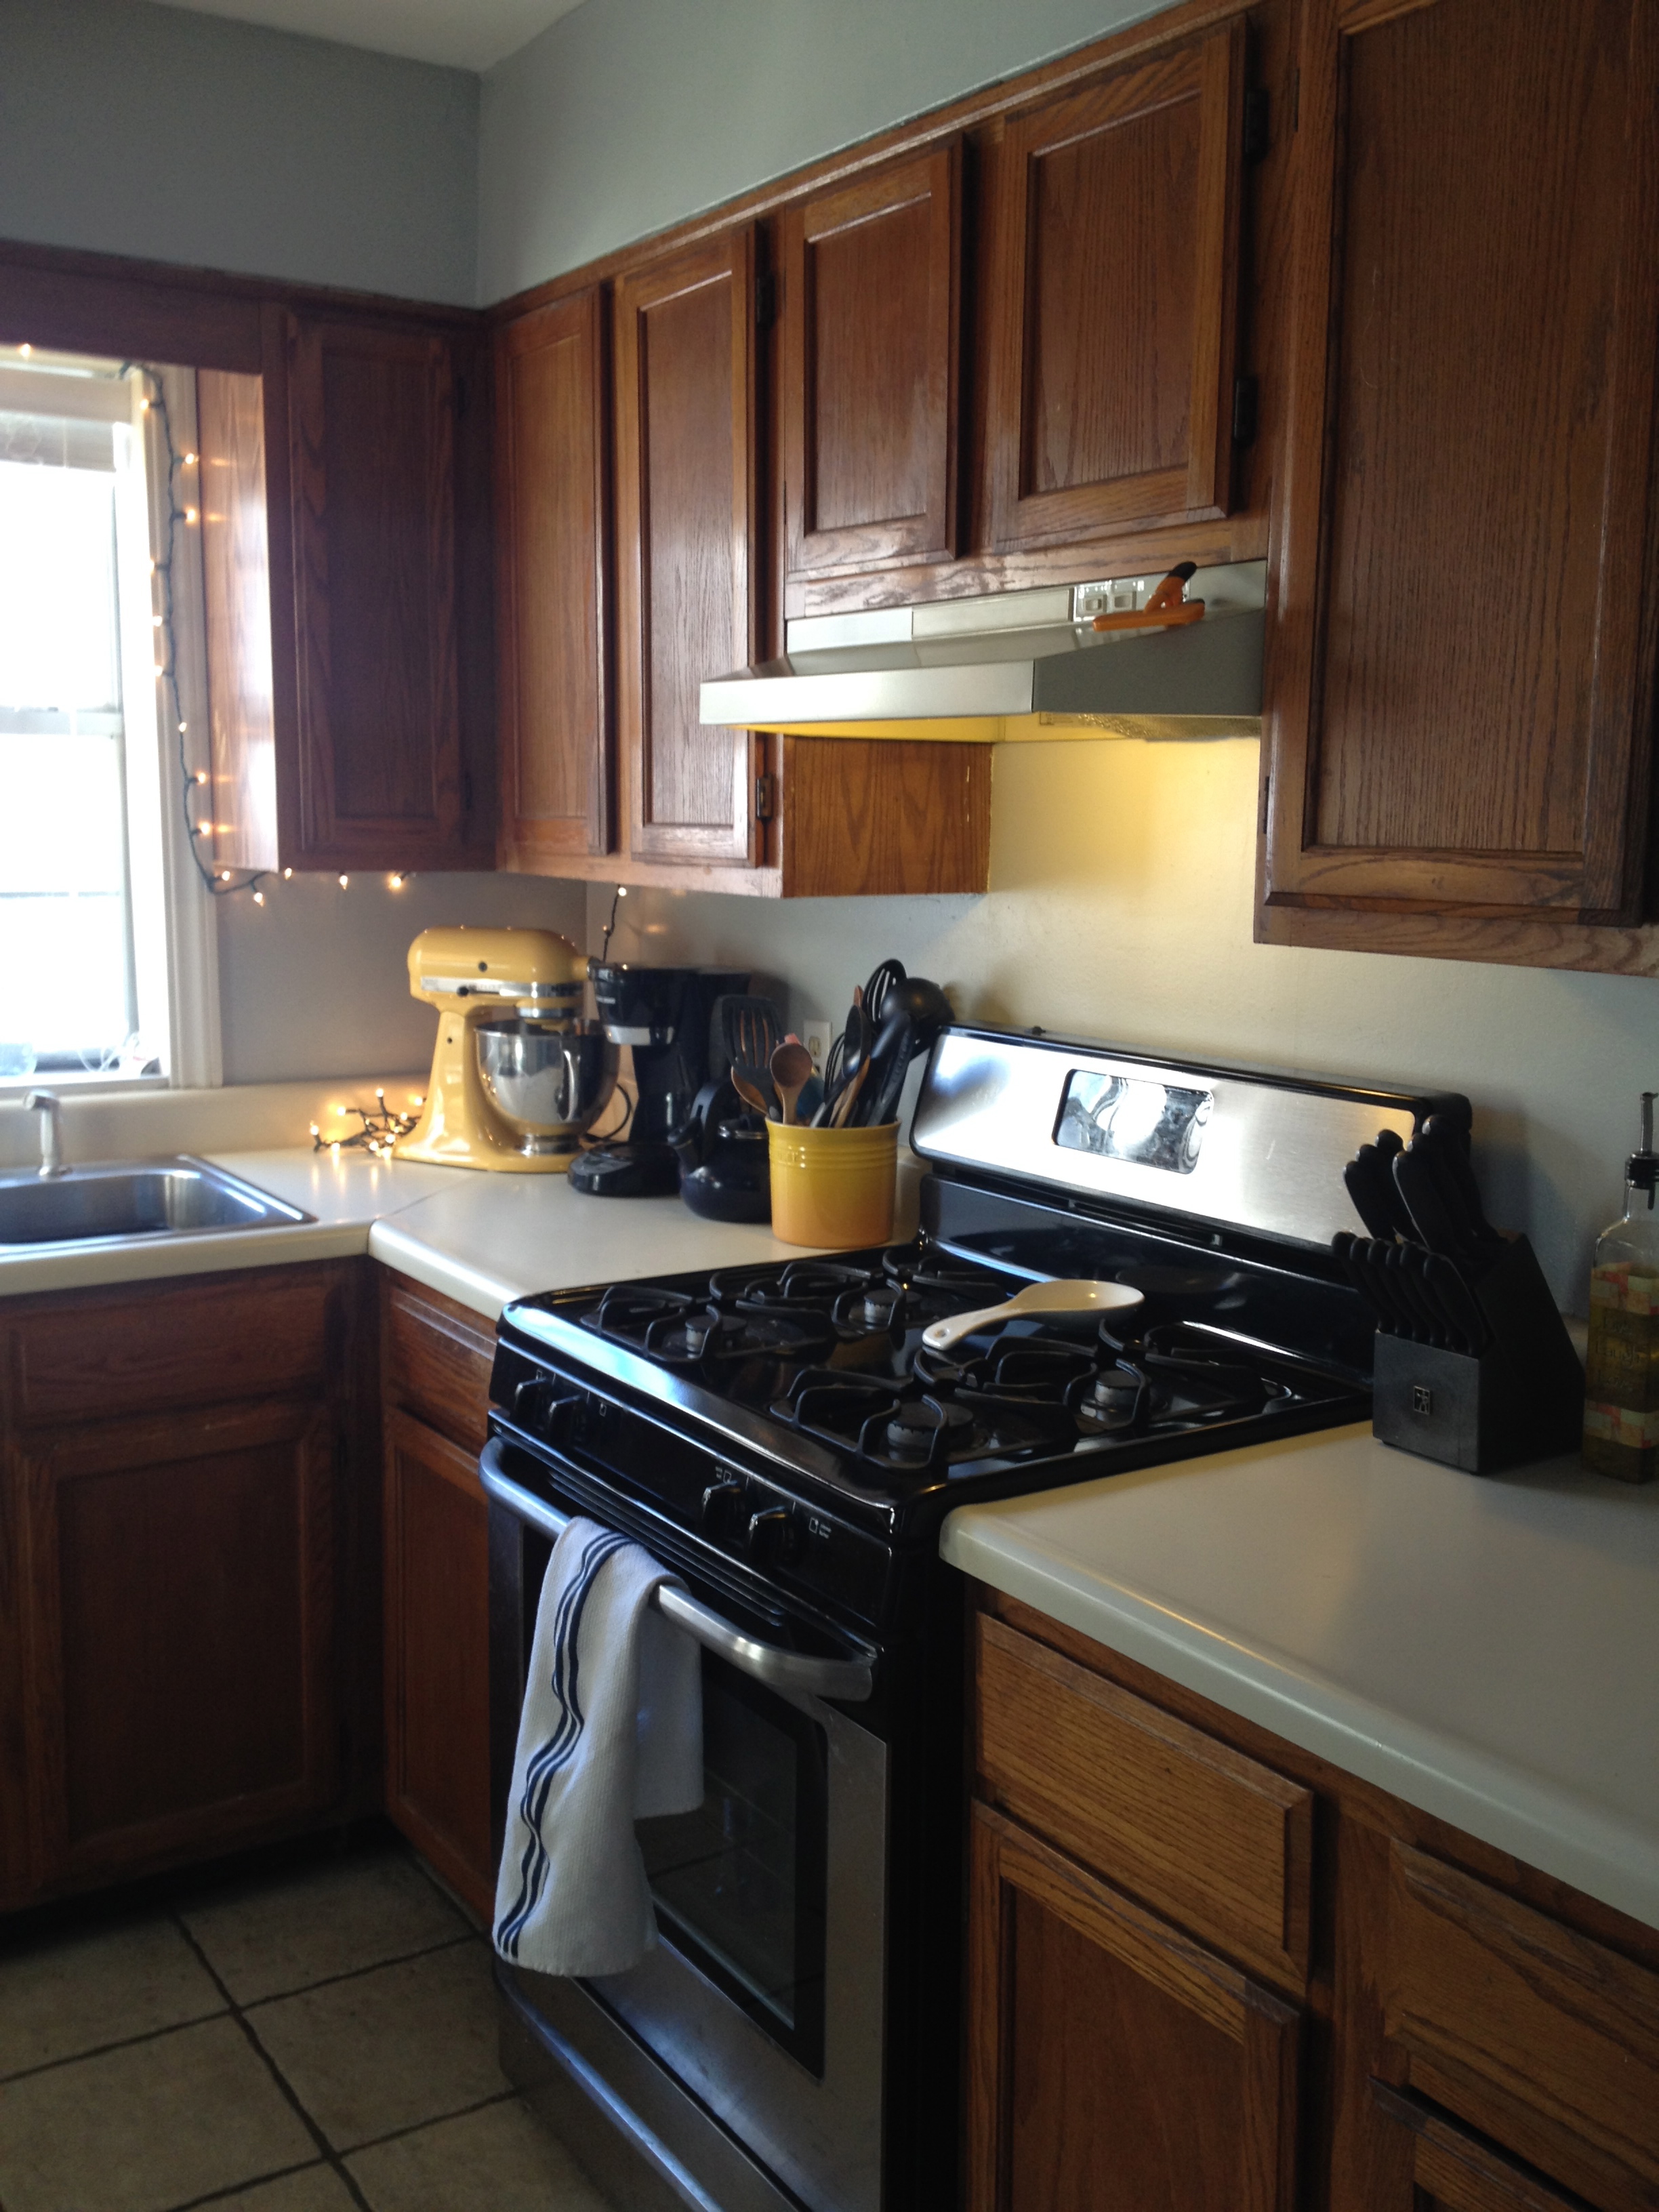
All-in-all, we are very happy with how it turned out. I would still love to have different cabinets. And different floors. And new light fixtures. But it is just a rent house, and those things don’t seem quite so bad with the fresh coat of paint brightening up the room!

Looks SSSOO great!! I love the chalkboard menu! Yay for a fresh look and no more icky wallpaper!